Author Archive

ModSecurity 2.5.11 x64 (64 Bit) Windows Binary

ModSecurity

ModSecurity 2.5.11 was released on November 6, 2009. And so, here is the 64 bit binary for Windows. It also includes latest version of libxml2 (version 2.7.6).

For installation instructions, refer to the ‘install.txt’ file in the zip archive.

Download:

modsecurity-apache_2.5.11-x64.zip

CRC32: 231399B8

MD5: 6145769A5AB033AE97A7C2E7603A2F57

SHA1: D84F88289FAC06A77ABFDEA4322C85A277A60963

Apache HTTP Server 2.2.14 x86 and x64 MSI Installers

In my previous post I mentioned that I would create installers for any future versions of the Apache HTTP Server. And so, here I am providing 32 bit and 64 bit windows binaries for the Apache HTTP Server 2.2.14. The latest version as of this writing. It was released 6 days ago, but I only found out about it today. ๐Ÿ˜€

Anyway, as before, I have compiled these binaries using Vistual C++ 2008 (VC9) and I have provided “no-ssl” installers like Apache.org.

  1. apache_2.2.14-x64-no-ssl.msi

    CRC32: C5AE850F

    MD5: 87BDA86CC2B974FA833EC706FBC9EF6E

    SHA1: 9CD57B58E72C7B0560E4F39C9EC41657123B2E4B

  2. apache_2.2.14-x64-openssl-0.9.8k.msi

    CRC32: 17E37DB1

    MD5: 1304552D0F8FE7DDEFBBA39EC707EBB6

    SHA1: D6949866785B4F5FE5E08FD8A6594FF4B49417E4

  3. apache_2.2.14-x86-no-ssl.msi

    CRC32: C429FA99

    MD5: 66AF18A243CFBB570465AD54707C79A2

    SHA1: 45AF80ECF97975A87AE8069BC93EF05C9F868D0C

  4. apache_2.2.14-x86-openssl-0.9.8k.msi

    CRC32: 06C362BC

    MD5: 9BB4501E47D6B67D2AA60437BA74ED08

    SHA1: 9A87399FF6152B08A236FD820426BF7FED218AF9

I have tested the 64 bit binaries with Windows 7 and 32 bit binaries with Windows XP.

If a new version of Apache is released and you see that I haven’t posted installers for it yet, please post a comment and let me know. ๐Ÿ˜€

ModSecurity 2.5.9 x64 (64 bit) Windows Binary

ModSecurity

Update: ModSecurity 2.5.11 is now available.

Now that I am using 64 bit version of the Apache HTTP Server, I also have to use 64 bit version of ModSecurity. I couldn’t find a 64 bit binary of the latest version (2.5.9 at the time of this writing), so I decided to compile it myself.

Anyway, I am posting this binary here for anyone else who needs it. I am currently using it with Apache 2.2.13 in Windows 7. It was compiled with Visual C++ 2008 (VC9), with libxml2-2.7.3 and lua-5.1.4.

Download:

mod_security-2.5.9-win64-x64.zip

CRC32: A5642466

MD5: E86DA5091B639CD5E8CEB1422D7101C1

SHA1: 53D09F4E2F52ABE3D21C8BBBE6FC6FC66B545BCB

Apache HTTP Server 2.2 x64 and x86 MSI Installers

Apache

Update: Installers for Apache HTTP Server 2.2.14 can be found here.

I haven’t posted anything in my blog for quite some time. Itโ€™s been more than half a year actually. ๐Ÿ˜ฎ Anyway, itโ€™s about time for me to post something new. I will start by posting MSI installers for Apache HTTP Server 2.2.13.

Why did I decide to create these installers?

Well, now that Windows 7 has been released to manufacturing, I have started using Windows 7 64 bit. I was using 32 bit version of Windows 7 RC earlier and before that it was 32 bit Windows Vista. I had Apache, MySQL and PHP installed on my previous Windows installations, and now that I was using a 64 bit operating system, I wanted to install 64 bit versions of Apache, MySQL and PHP. MySQL.com has already been providing 64 bit binaries for Windows and I also found 64 bit binaries for PHP 5.3 here (although they aren’t meant for production use). But there is still no 64 bit version of Apache available from the official site. I did find unofficial 64 bit binaries at http://www.blackdot.be/?inc=apache/binaries, but in a zip file; without an installer.

So I decided to compile Apache myself and also create an installer for the compiled binaries. An installer makes it easier to install the software at any location of your choice, and also allows you to install only the components that you need.

It took me a while to set up the build environment on my new installation of Windows (Visual Studio 2008, Windows SDK 6.1, etc). While I was compiling Apache, I remembered that the official 32 bit binaries are compiled using VC6 and since I already had the build environment set up, I decided to compile 32 bit binaries too. These binaries that have been compiled with Visual C++ 2008 (VC9) should have “improvements in performance and stability” compared to the official Apache.org binaries.

Read More

Windows Vista: Games Explorer takes too long to load?

Sometimes in Windows Vista, Games Explorer may take too long to load. This can happen when your Windows Experience Index needs to be updated. This in turn can happen if you added some new hardware to your PC or because you may have reinstalled or updated some of your hardware drivers.

This has happened to me many times. Everytime I install a new version of nvidia’s graphics driver, Games Explorer starts taking a lot of time to load. And I find that the Windows Experience Index score turns grey, which means it needs to be updated since windows ‘detected’ new hardware

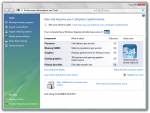
Today, again when I tried opening Games Explorer, it took a long time to load. And I noticed that the Experience Index was again grey. So I clicked on the Update my score link on the ‘Perfomance Information and Tools’ window, to refresh my Windows Experience Index, and after that Games Explorer started behaving normally again.

So, if you are having the same problem with Games Explorer, try refreshing your Windows Experience Index. ๐Ÿ™‚

cPanel: Upgrade ClamAV to latest version

A new version of ClamAV was released recently.ย  Version 0.94.1 at the time of this writing. cPanel however is going to take some time to release the update. In the meantime you will keep getting messages like the following in your logwatch emails or when you try to manually update the clamav databases by using the ‘freshclam’ command.

WARNING: Your ClamAV installation is OUTDATED!
WARNING: Local version: 0.94 Recommended version: 0.94.1
DON’T PANIC! Read http://www.clamav.net/support/faq

If you are like me and like to keep your server software up to date, there is a simple way to upgrade to the latest version of ClamAV manually, on a cPanel powered server.

First, login to your server using SSH. Then use the following commands.

For 32 bit installations:
cd /usr/local/cpanel/modules-install/clamavconnector-Linux-i686

For 64 bit:
cd /usr/local/cpanel/modules-install/clamavconnector-Linux-x86_64

Then, download the source tarball of the latest version of ClamAV using wget. At the time of this writing, the latest version is 0.94.1. You can find the download link for the latest source at http://www.clamav.net/download/sources/

wget http://freshmeat.net/redir/clamav/29355/url_tgz/clamav-0.94.1.tar.gz

Now, open the file ‘install’. This file is located in the current directory, that is clamavconnector-Linux-i686 or clamavconnector-Linux-x86_64 depending on your OS architecture.

nano install

Find the line ‘AVV=0.94’ and change it to ‘AVV=0.94.1’
Find the line ‘AVVOLD=0.93.3’ and make it ‘AVVOLD=0.94’
The values in those lines will depend upon the version of your ClamAV. Save the ‘install’ file after making the changes.

Then edit the file ‘progversion’ and put the latest version of ClamAV there. You can do this with a simple command.

echo "0.94.1" > progversion

Finally, run the install script with the command ‘./install’.

And thats it. Your ClamAV should now get upgraded to the latest version.

After the installation is complete, remember to make sure that both ClamAV and the mail server are working fine.

In case anything goes wrong, you can always uninstall and reinstall ClamAV.

Installing and Configuring PPTP VPN on RHEL/CentOS 5

In the following tutorial, I will explain how to set up a PPTP VPN server on RHEL/CentOS 5, so that you can use it to browse the internet. So, if you have a RHEL/CentOS 5 dedicated server in US, you will be able to access US only sites.

A set up like this also has other benefits. Since the connection between the server and your computer will be encrypted, your ISP wont be able to intercept or track your internet usage.

Installation and Configuration

Ok, so lets get started. First make sure that you have ppp installed.

yum install ppp

In my case it was already installed, so I got the message ‘Package ppp – 2.4.4-1.el5.x86_64 is already installed’.

After you make sure that you have ppp installed, download and install Poptop. You can get the RHEL/CentOS 5 RPMs from http://poptop.sourceforge.net/yum/stable/rhel5/. I was using 64 bit version of CentOS 5. So I downloaded and installed the 64 bit (x86_64) version of the RPM.

wget http://poptop.sourceforge.net/yum/stable/rhel5/x86_64/pptpd-1.3.4-1.rhel5.1.x86_64.rpm

rpm -ivh pptpd-1.3.4-1.rhel5.1.x86_64.rpm

After installing Poptop, open the file /etc/pptpd.conf.

nano /etc/pptpd.conf

Go to the end of the file where you can see examples of localip and remoteip. Below them add your own values for localip and remoteip.

localip 10.0.0.1
remoteip 10.0.0.10-100

In the above, 10.0.0.1 will be used for the ppp interface and 10.0.0.10 – 10.0.0.100 will be assigned to the clients. You can also use different private IPs in ‘localip’ and ‘remoteip’, like 10.20.26.1 and 10.20.26.10-100. The OpenVPN documentation has some good info about numbering private subnets. Click here to check it out.

Next, open the file /etc/ppp/options.pptpd.

nano /etc/ppp/options.pptpd

Uncomment the ms-dns lines (by removing the ‘#’ in front of them) and change them to the dns servers provided by your ISP or to public DNS servers like ones provided by OpenDNS.

ms-dns 208.67.222.222
ms-dns 208.67.220.220

Thats all you need to change in the options.pptpd file. Next you will need to edit the file /etc/ppp/chap-secrets to add usernames and passwords for your clients. You need to enter the usernames and passwords in the following format.

# Secrets for authentication using CHAP
# client server secret IP addresses
username pptpd password *
username2 pptpd password2 *

You can also put a * in place of ‘pptpd’ just like there is a * below ‘IP addresses’. Also instead of a * below ‘IP addresses’ you can put the IP address from which the client will be connecting.

Read More